
Menyalakan dan Mematikan LED dengan Push Button Arduino
Steps Controlling LED with Push Button - Arduino. Connect the LED to the breadboard. Connect the shorter leg of the LED to a row on the breadboard, and the longer leg to a different row. If you are using a 220-ohm resistor, connect it between the LED and the breadboard row as well. Connect the pushbutton to the breadboard.

Arduino push button LED YouTube
Introduction This tutorial demonstrates how to Arduino Push Button LED ON/OFF Code | Arduino Tutorial. The push button will toggle the LEDs on and off in a specific sequence. This is a great introduction to basic programming concepts and can be easily modified to create more complex LED sequences.

Push Button with Arduino Pull up & Pull down resistor Led Control using Button YouTube
Connecting a push button with an Arduino is very simple. Connect one terminal of the push button to the ground pin and another terminal to any Arduino digital pins. Here you have to use a pull-up resistor (10k Ω) to keep the voltage HIGH when you are not pressing the button.
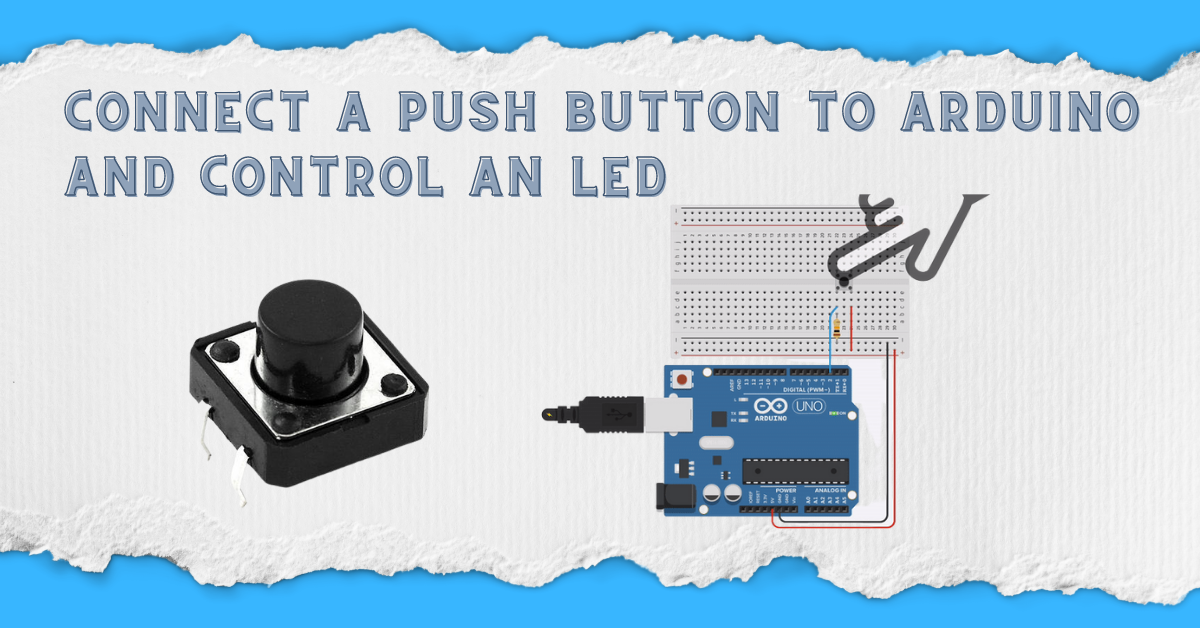
How to connect a push button to Arduino and control (on/off) an LED Electronic Smith
Previous. Now you're ready to write code that will turn your LED on while the button is pressed. In Arduino, select File→New (if you have another sketch open, you may want to save it first). When Arduino asks you to name your new sketch folder, type. Type the code into Arduino as shown in Image 1.

Arduino (Leonardo Pro Micro) push button tutorial on breadboard with LED Output YouTube
The toggle action means inverting the digital state of the output pin (or LED). To create an Arduino button toggle action, we'll follow the steps below: 1. Define an output pin (for the LED) 2. Define an input pin (for the push button) 3. Read the button input pin. 4.

Video How to Use Arduino & Push Button Switches to Turn an LED on/off
Push buttons or switches connect two points in a circuit when you press them. This example turns on one led when the button pressed once, and off when pressed twice. In this tutorial you will also learn how to use 'flag' variable to control an event. So, let's get started! Ask Question Step 1: What You Will Need For this tutorial you will need:

Use an Arduino to control an LED with 2 push button switches YouTube
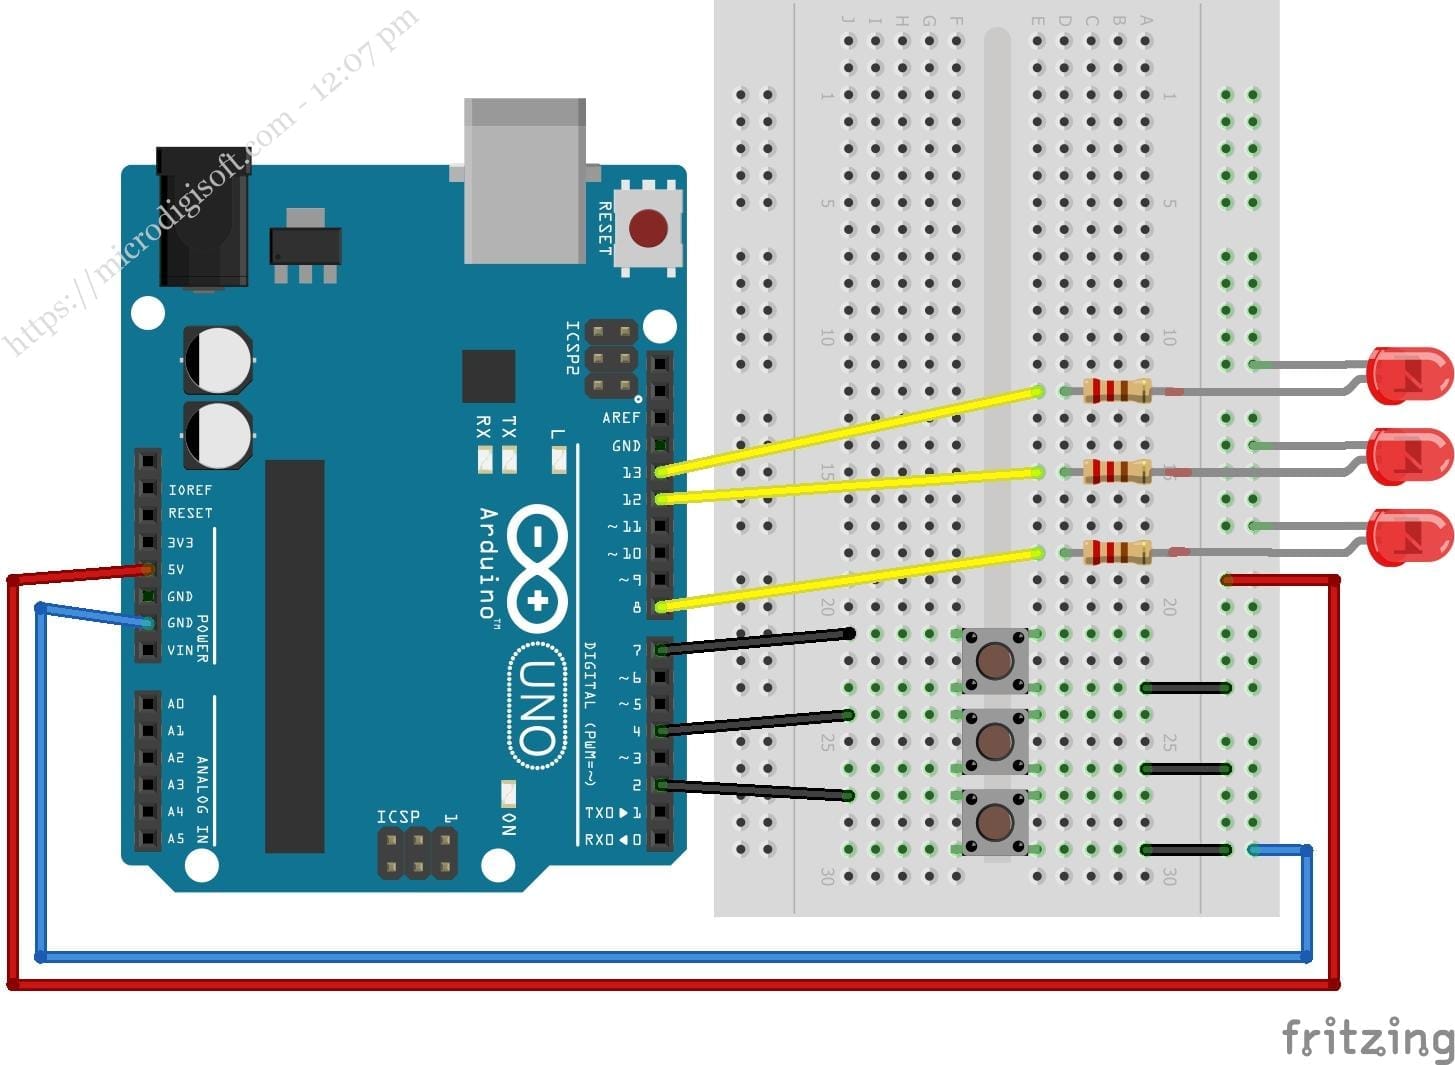
In arduino button led projects, push button is used to cont. In this tutorial, I will show you how to control a 3 led with a push button by using Arduino Uno.

Can's Robotics & Arduino Blog RGB Led control via Push Buttons
No matter what you love, you'll find it here. Search Arduino Button Led and more. But did you check eBay? Check Out Arduino Button Led on eBay.
Controlling LEDs with Multiple Push Button Using Arduino
Did you know that you can use Arduino to turn on an LED when you press a button? Well, it is true, you can do this! Leaving the joke aside, let me show how you can achieve this. You will need the Arduino Board, a 560Ω resistor, and LED and the code example below. Products used in-Article Arduino Micro (With Headers) | A000053
Tutorial 5 Control LED with pushbutton on Arduino
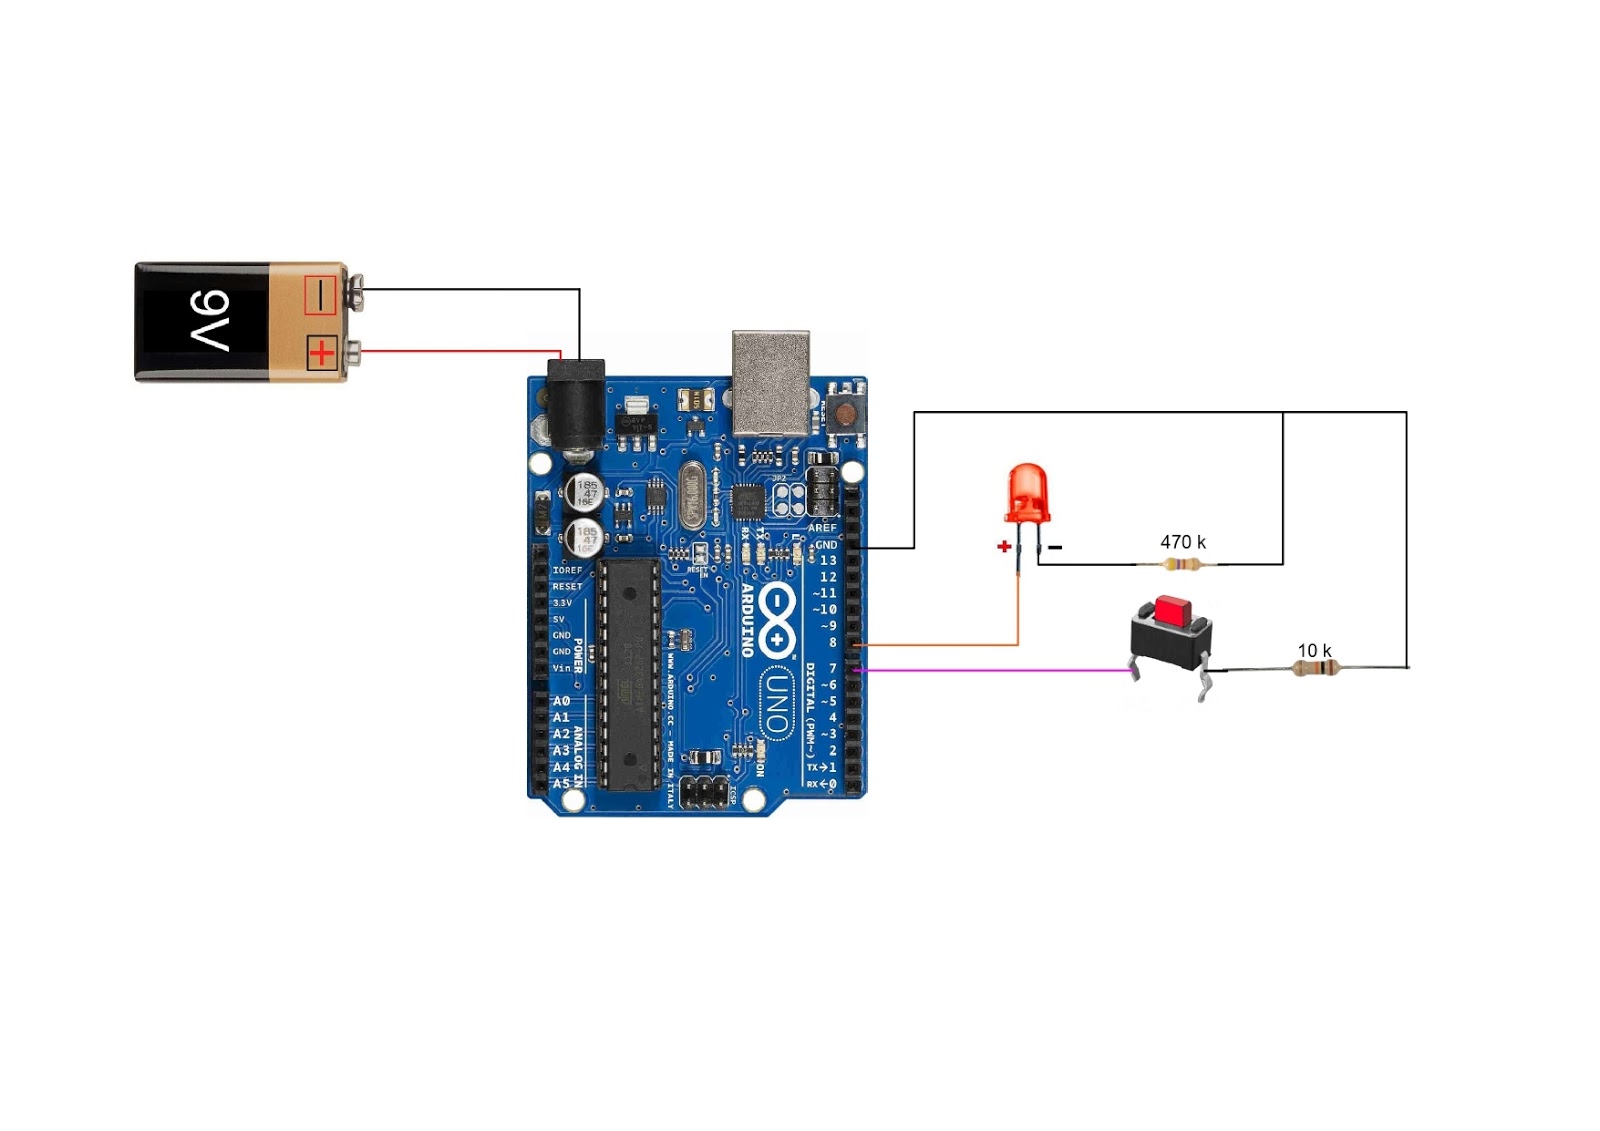
STEP # 1 ( Make Push Button Connections ) Pin1 to 5V of Arduino. Resistor 10k B/w Pin2 of Push Btn & GND of Arduino. Pin2 is also connected to D6 of Arduino. STEP # 2 ( Make LED Connections ) Connect All -VE of LED To GND to Arduino. STEP # 3 ( Make Resistors Connections ) All Resistor's to +VE of LED and then D7,D8,D9,D10,D11,D12,D13 of Arduino.

Arduino push button led arduino button led projects YouTube
They're used here to set pin numbers: const int BUTTON_PIN = 7; // the number of the pushbutton pin const int LED_PIN = 3; // the number of the LED pin // variables will change: int buttonState = 0; // variable for reading the pushbutton status void setup() { // initialize the LED pin as an output: pinMode(LED_PIN, OUTPUT); // initialize the pus.
Push Button controlling LED Programming Arduino using Matlab 2 eediary
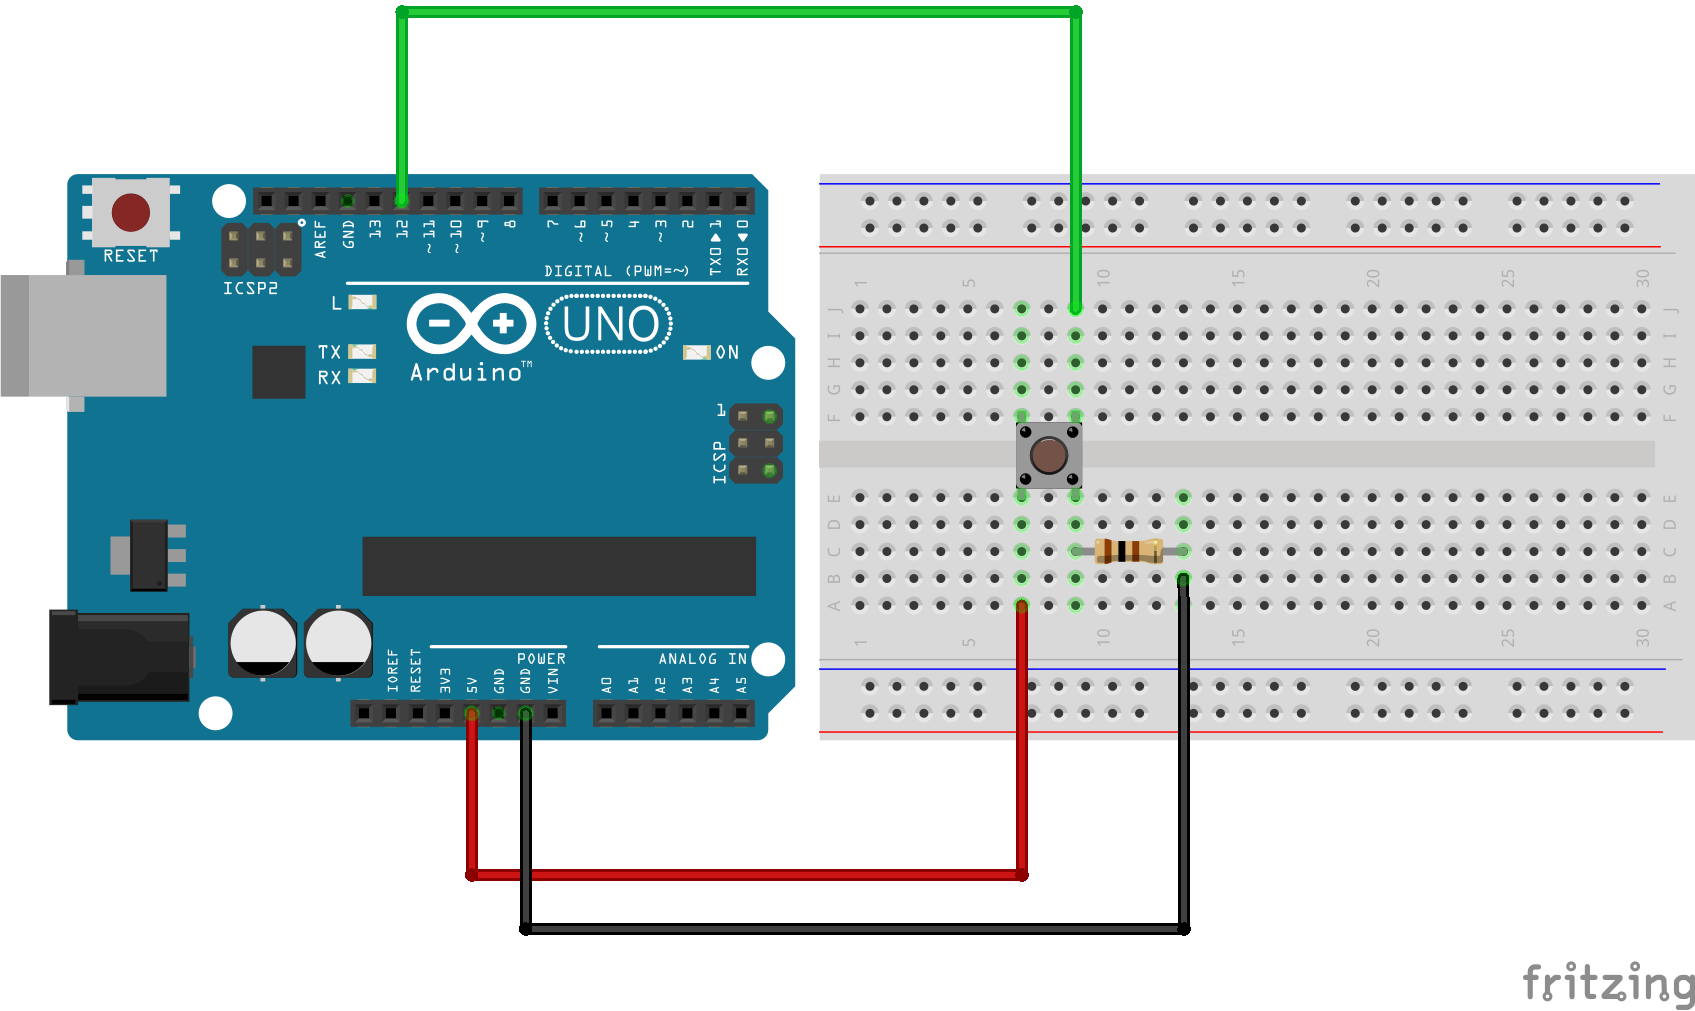
Tutorial goals Knowing how to use a pull-up / pull-down resistor Inverting a switch Knowing how to use a push button Components needed 1× Arduino 1× Breadboard 3× Jumper wire (male-male) 1× Min 10K Ohm resistor 1× Push button / Tactile switch Buy components $ 7.35 Arduino Uno (clone) with cable $ 35.89 5x Arduino Uno (clone)

Arduino 3 LED and One Push Button
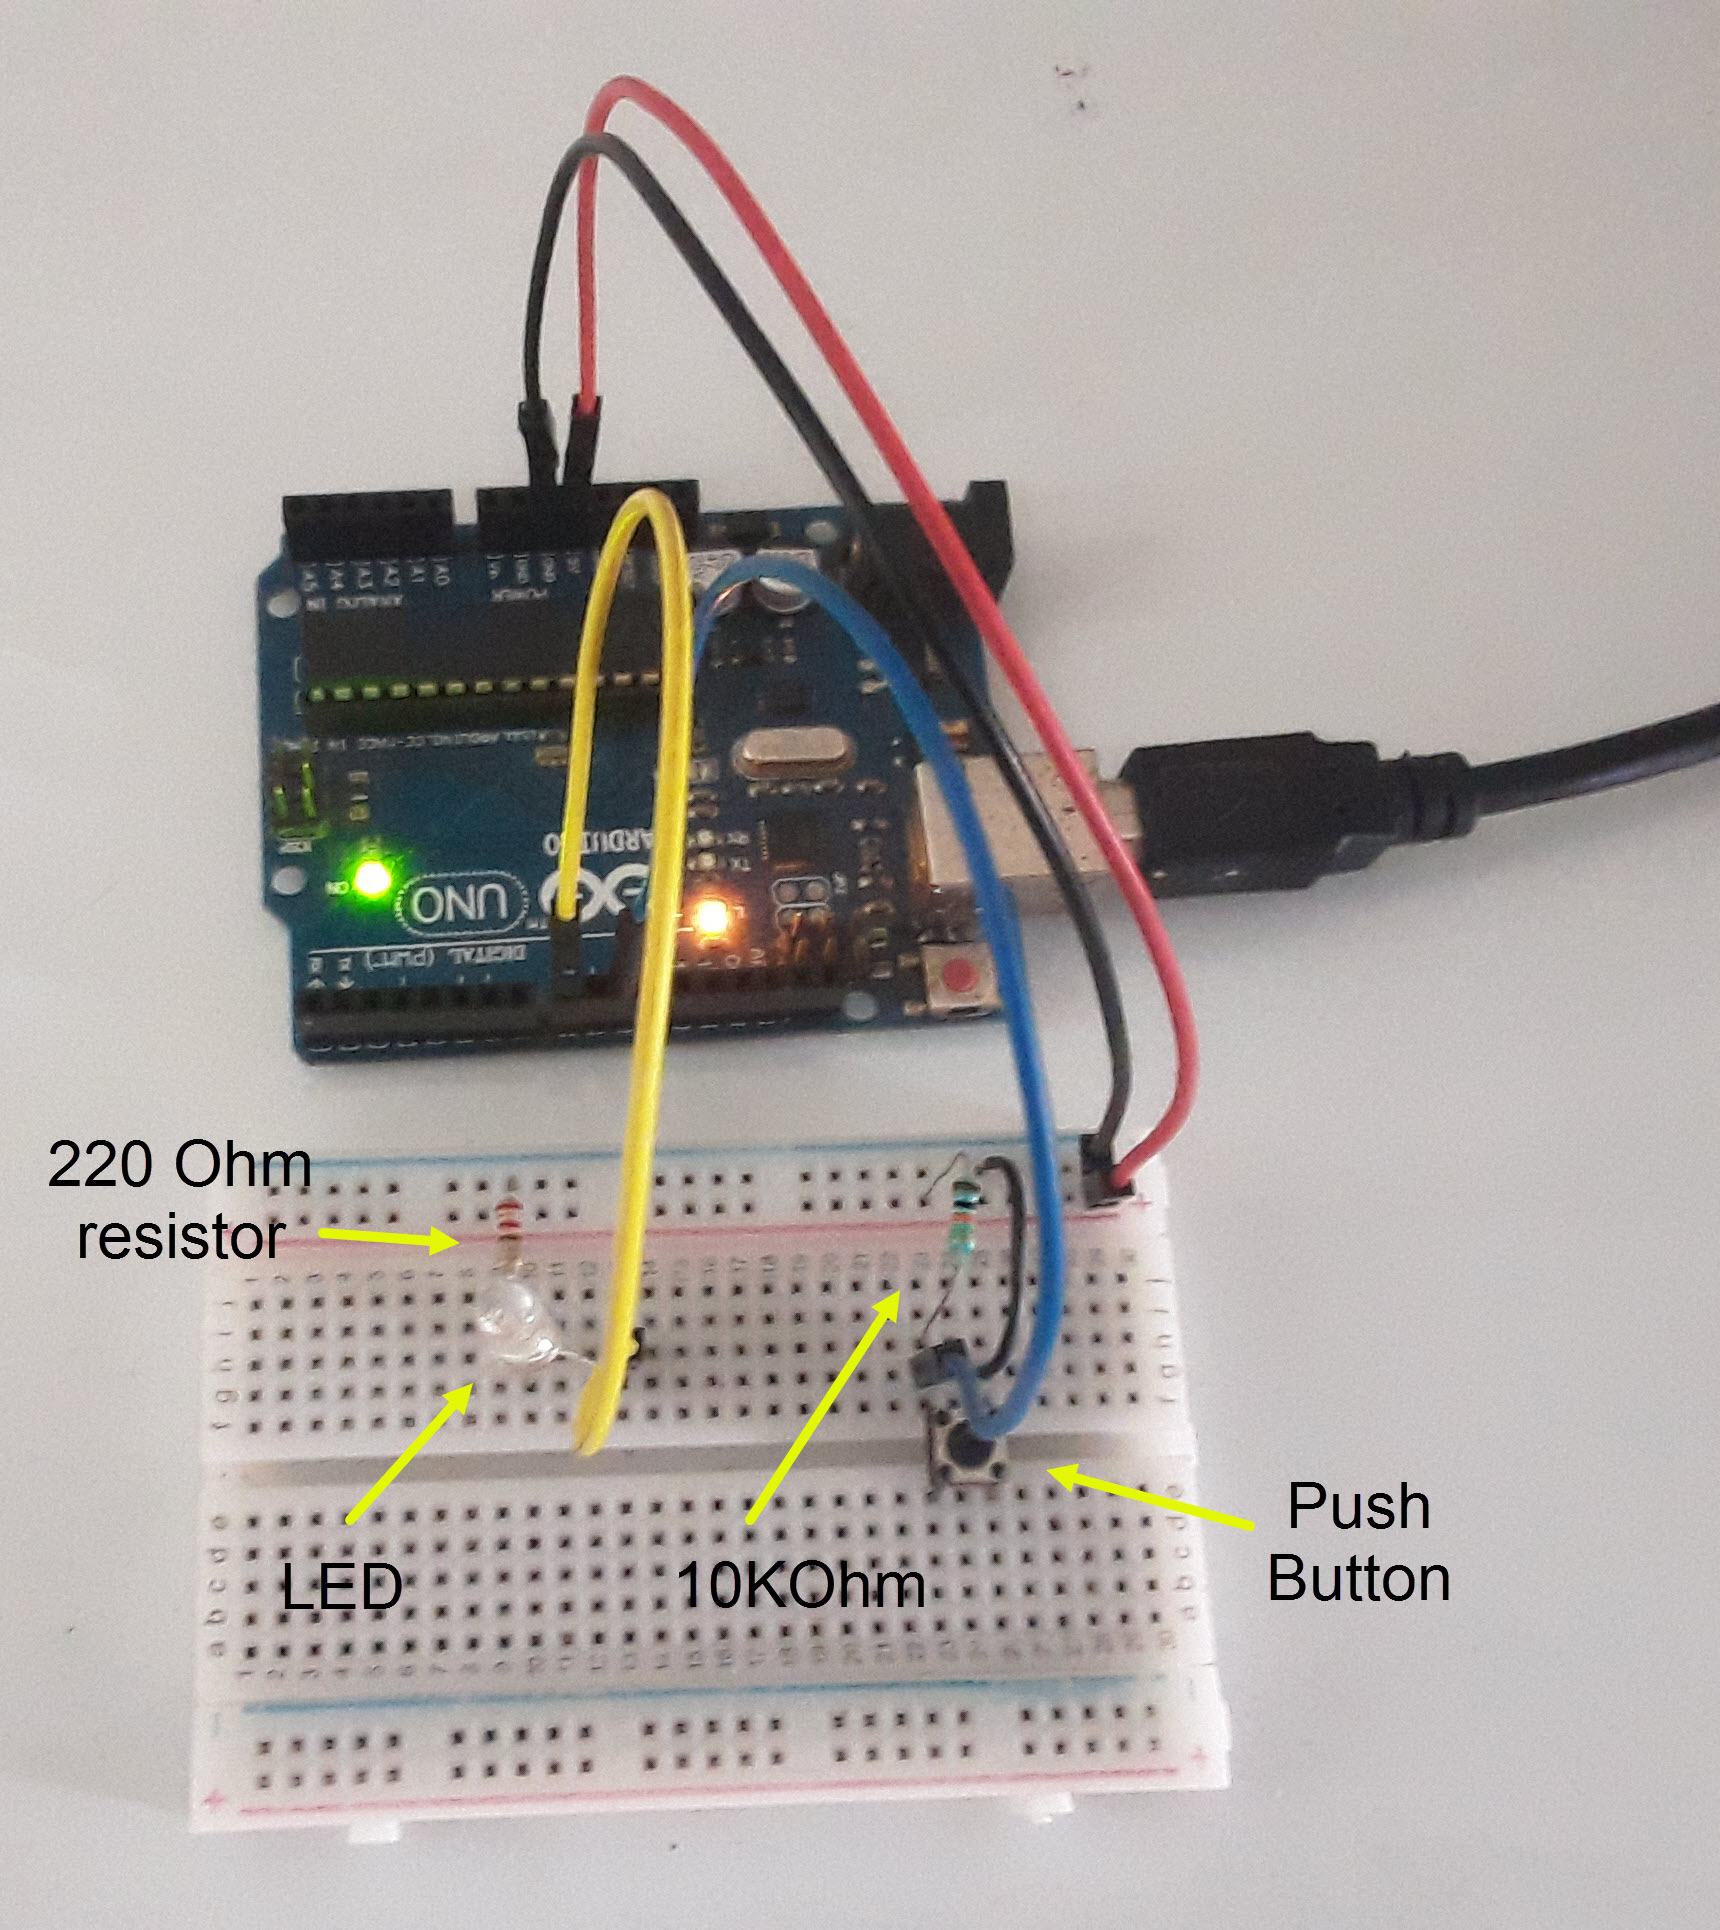
Push button. 220 Ohm resistor for the LED. If you don't have this specific value, any resistor from 330 to 1k Ohm will do. 10k Ohm resistor for the push button. If you don't have, you can go until 20k-50k Ohm. A bunch of male to male wires (including if possible black, red, and other colors).
Led on off using push button Wired Connection Arduino
Pushbuttons or switches connect two points in a circuit when you press them. This example turns on the built-in LED on pin 13 when you press the button. Hardware Arduino Board Momentary button or Switch 10K ohm resistor hook-up wires breadboard Circuit Connect three wires to the board.
Arduino LED Push Button Project YouTube
Intro Arduino - Turn LED On and Off With Push Button Robotics Back-End 18.1K subscribers Subscribe Subscribed 79K views 1 year ago Arduino Learn how to work with an LED and a Push.
Control LED with Push Button Arduino Tutorial
Push button. Potentiometer. Here is the circuit. You are learning how to use Arduino to build your own projects? Check out Arduino For Beginners and learn step by step. Steps to build the circuit: Connect a GND pin from the Arduino to the line made for GND on the breadboard (the "minus" line).